Uninstall
Uninstalling and re-installing software must be a good choice to refresh the software when you meet issues. This is a great first step to follow when programs stop acting as they should; we find that most issues will be fixed after this process. This tutorial provides instructions for uninstalling the SongGet on Windows and Mac.
How to uninstall the SongGet on Windows?
Step 1: Open "Control Panel"
The ways to open "Control Panel" differ according to operation systems.
- For Windows 10/11: in the search box on the taskbar, type control panel, and then select "Control Panel".
- For Windows 8/8.1: move your mouse cursor to the upper right corner of the screen to reveal the Charms Menu, where you can find and tap the Settings icon to continue. On the Settings menu, click "Control Panel".
- For Windows 7: click the Start button, find and then click Control Panel.
Step 2: Enter the "Uninstall a program" Panel
In the new window, find the "Uninstall" option and click to enter the "Programs and Features" panel. 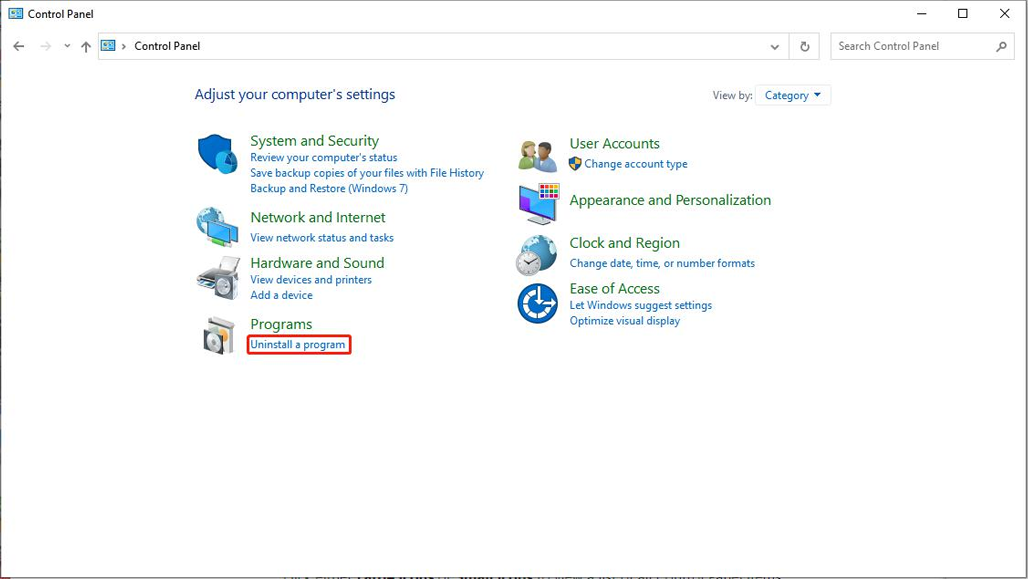
Step 3: Start to Remove SongGet
In the "Programs and Features" panel, scroll down until you see the SongGet program. Hang the mouse on the SongGet icon and right click. Choose "Uninstall". Then, on the pop-out window, confirm the SongGet uninstalling process. 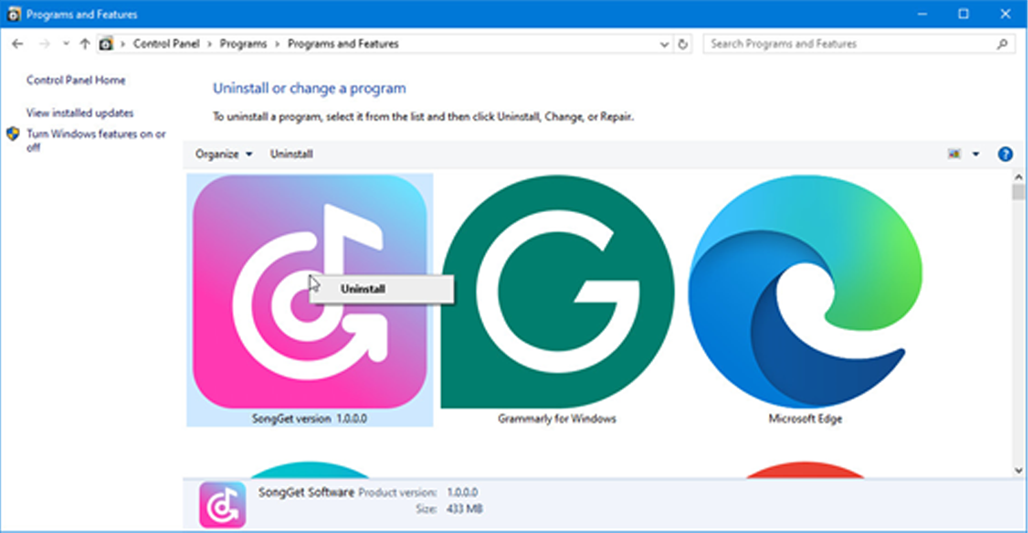
How to uninstall the SongGet on Mac?
On Mac computers that run macOS 10.15 or later, you could easily remove SongGet on Mac. There are different ways to do that:
- If you have created a SongGet app icon on the desk, directly drag and drop it to the trash icon to uninstall SongGet on Mac.
- Or, you could open the Applications folder, find SongGet icon, right click it and then choose “Move to Trash” option to remove SongGet on Mac.